

Please ensure that you read the getting started articles in preparation for working with this template.
Snapshot of the template configuration

This template has a total of 11 module positions the bulk of which scroll in the main content area. There are two module positions that are triggered by the tabs on the side - advert1 and advert2.
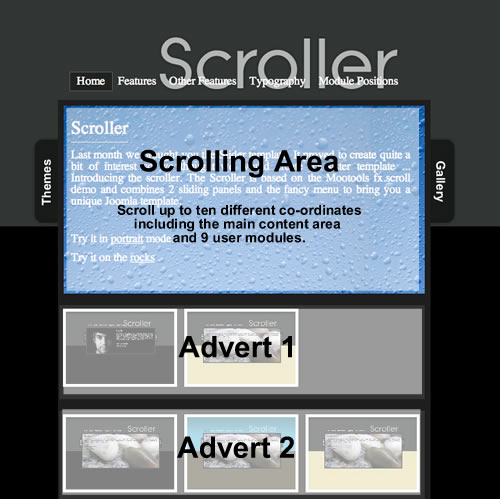
The modules are defined in a scrolling area the user one to user nine module positions. As you can see in the screenshot above in the template parameters that the positioning of the modules inside the scrolling area relates to the coordinates that you create in the template admin.
That is you control the position of each module in the scrolling area by specifying the top and left offset in the pixel value from the left and top edges of the scrolling container. As an example if you want to position the user one module 600 pixels from the top and 800 pixels from the left of the starting area then you simply need to add the values 600px and 800px to the top1 and left1 input fields.
As you can see on the Scroller demo site its possible to apply transparent overlays to the module or page in order to separate the text up off the page. This is a perfect solution if you are using a complex background image within the scrolling container.
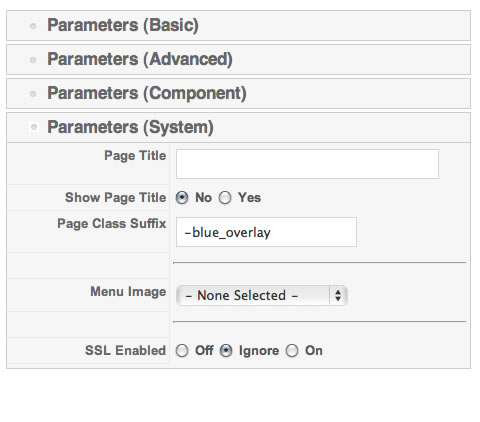
Applying the overlay is as simple as applying a module class to the module you are displaying or in the case of the first slide (ie the Joomla content area) a page class suffix to the main menu item.
Module classes can be applied to pretty much any Joomla module that you're using to display in the scroller. Please see the following module classes that are available in this template:
You can see examples of the module classes in action on the scroller demo site.
if you want to apply the same overlays to the first slide that appears on your site, then you need to apply it what's known as a page class suffix via the main menu item on your site; e.g. the default menu item.
The page class suffix uses the same syntax as that shown above. Please see the diagram below for example.
The scrolling menu behaves in a different manner to a normal Joomla template. In fact the scroller menu is not related to the Joomla core menu at all. The menu items themselves are hardcoded into the template and you set the title for each menu item in the template parameters.
As an example the labels for the menu item correlate to the module position that you are scrolling. So if you set the label for the user five module position to services, you need to make sure that any module that is published to the user five position correlates to the information that you want to display under the services tab. So when you visit the front end of your site you should see the services menu item and when you click on it it should scroll into view all modules published to the user five position.
If you do not have any module positions published to the user five module position then the services tab will not display.
It's worth noting that when you click on the home menu item it doesn't actually take you to the home page, that menu item scrolls you back to the starting position - e.g. the first slide that you can see when you refreshed or load the page.
It's worth noting that when we designed the scroll a template we really just sort as an ideal template with some fancy effects for a one-page site. There have been some attempts to implement multiple pages within this template but the results have been varying.
In the scroll a demo you can see the two tabs that sits inside of the container that holds the main scrolling area. These tabs trigger to drop-down panels that store the advert won an advert to module positions. The animation, time and general appearance of these drop-down panels can be controlled via the template admin. The tabs will only appear if you have a module published to the advert1 position in the case of the left tab or a module published to the advert2 position in the case of the right tab. The text on the tab is an image and can be edited via the source files that you can find in the download area.